The MGA With An Attitude
MGA Guru Is GOING MOBILE - (June 1 - June 15, 2026)
Monday, June 1, 2026:
Spent a lot of time expanding Part Numbers pages for all parts of the MGA Windscreen Washer Kit option. There are three different numbers for the collective optional kit, two different fluid containers, four different numbers for the "Control Assembly" (manual push pump), four numbers for Jet Mounting Assembly, and only one number for the spray jet. Collectively about 25 part numbers, each begging for their own tech page. This is going to take a while, working when I may have spare time.
Tuesday, June 2, 2026:
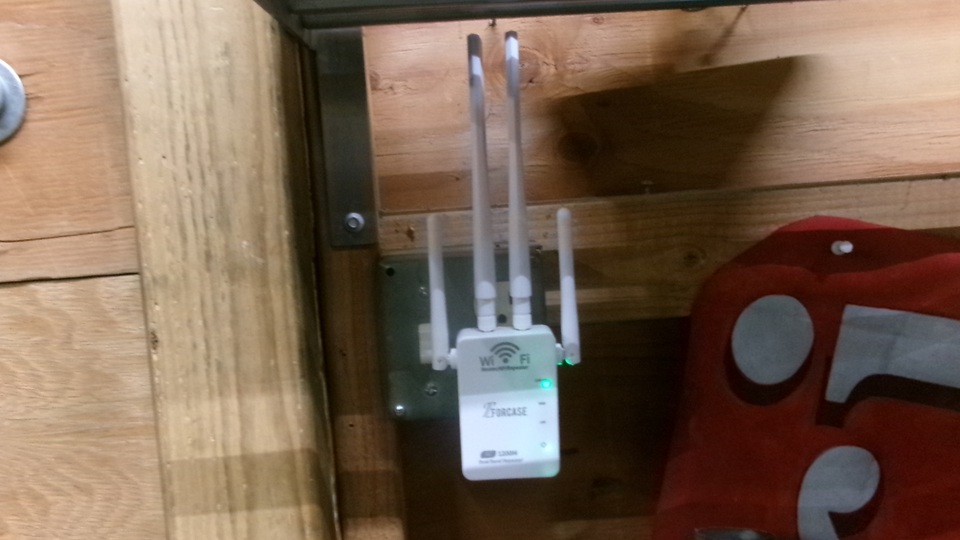
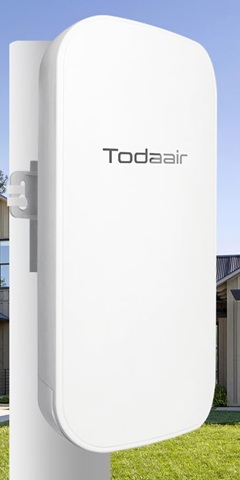
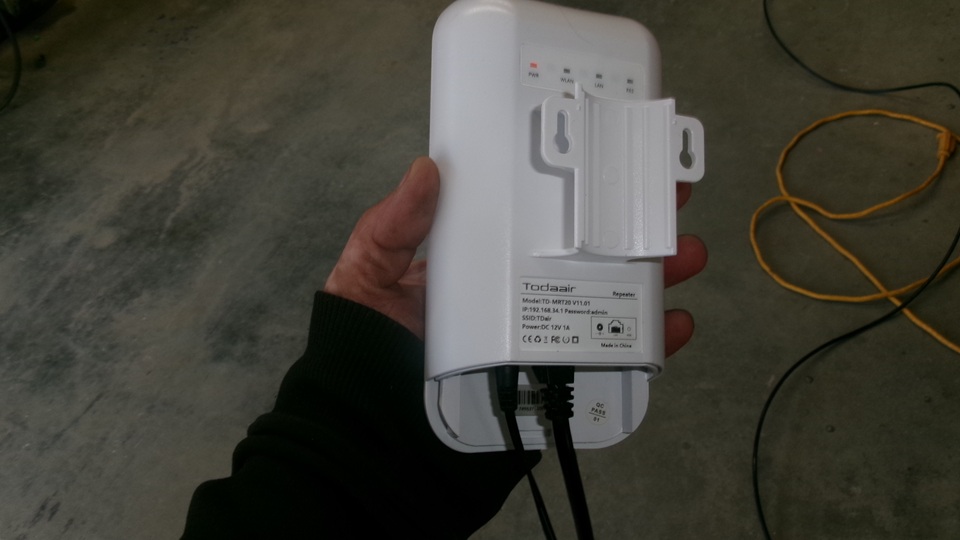
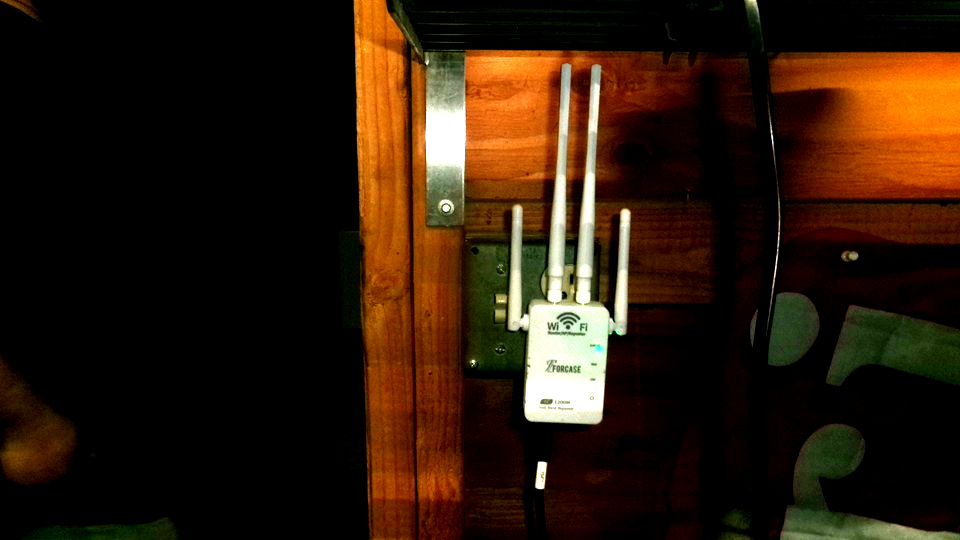
Good news in the morning, our WiFi repeater box has arrived, so we jump on that right away. A quick read of the meager
 instructions, and just plug the thing in. It is near a pass through door in the center of a 40-foot x 75-foot building. The center dividing wall is wood, while the building frame is steel and all exterior siding , doors and roof are steel. This is a very effective Faraday Cage, so with doors closed, radio signals from outside cannot not get inside. The intent here is to install an outside antenna and connect it with coax cable to the repeater box inside. This is supposed to create a strong WiFi signal inside that cannot get out, except in and out through the outside antenna.
First impression was very good, as it immediately created 4-bar WiFi signal throughout the entire building. With one garage door open, the incoming signal was good enough to give 5-Mb/s download and 2.5-Mb/s upload speed, which is at least as good as if we were standing outside. Of course when we close the door we get a 4-bar amplified signal with no data. Next move was to remove one of the four antenna from the repeater, screw on a 50-foot coax cable, and run that to the new outside antenna. Peachy, it still works, until we close the door, and then it's dead again, no data. Bummer, what a let down.
We grabbed an ohm meter to check continuity of the coax cable, all good, zero ohms on inner and outer conductors and no connection (no short) between them. Maybe an and connection? We removed the 50-foot coax cable, screwed the 10-foot antenna cable into the repeater, placed the antenna outside and the repeater inside, closed the door, and it was still not working. Maybe a bad antenna? Then we wanted to take the stick antenna we had removed from the repeater, connect it back to the repeater with the 50-foot cox in between. If that would work, then maybe to w new weatherproof outdoor antenna was bad, and maybe we could just put ythe little stick antenna outside.
But alas, we do not have the correct adapter fitting to attach the stick antenna to either end of the coax cable. This led to an hour of research to understand all of the possible combinations of SMA coax connectors. They can be either male pin or female socket, and either male or female threads, only four different connectors. But if you need to connect non-mating parts, there will be 16 different adapter fittings. Once we had a handle on this, all of theses fittings are easily available. We just ordered the adapter we needed from Amazon, and it should arrive on Thursday, back to waiting again.
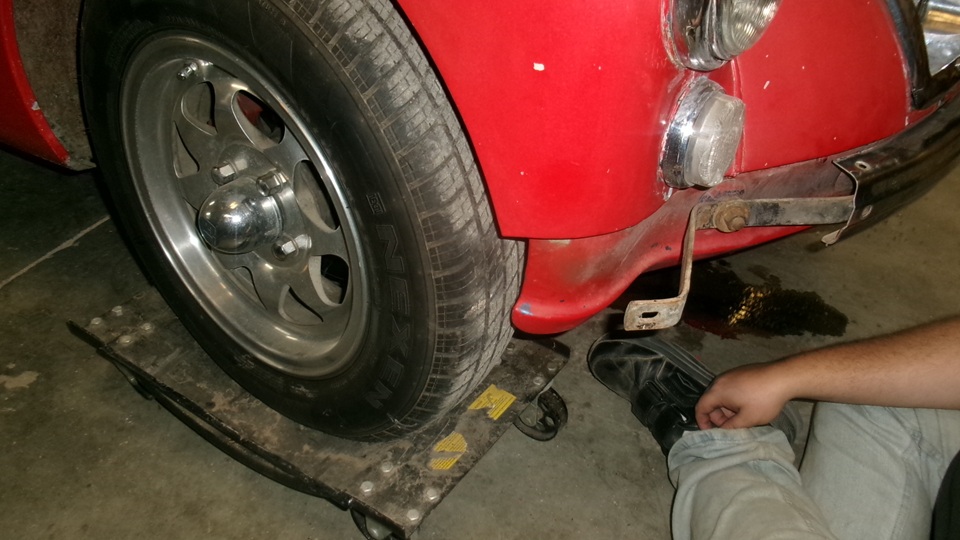
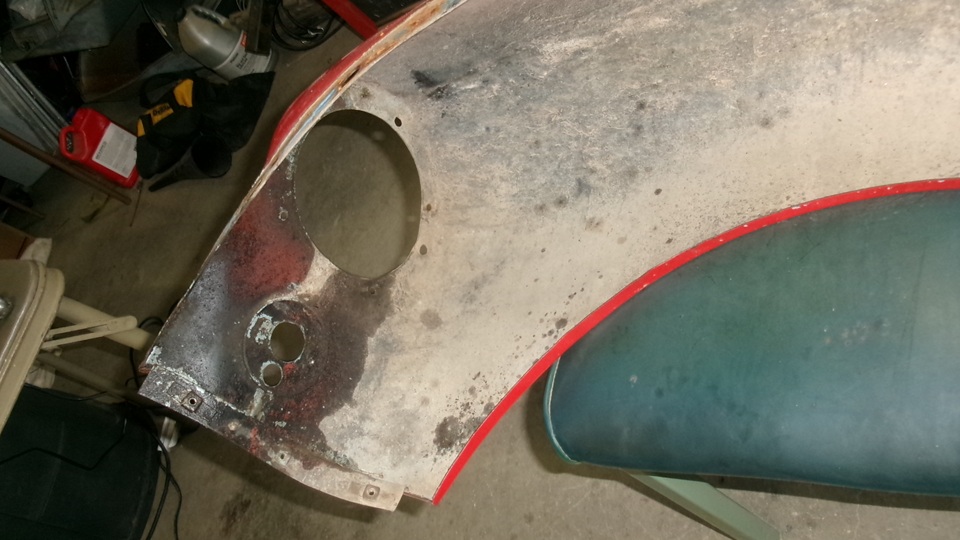
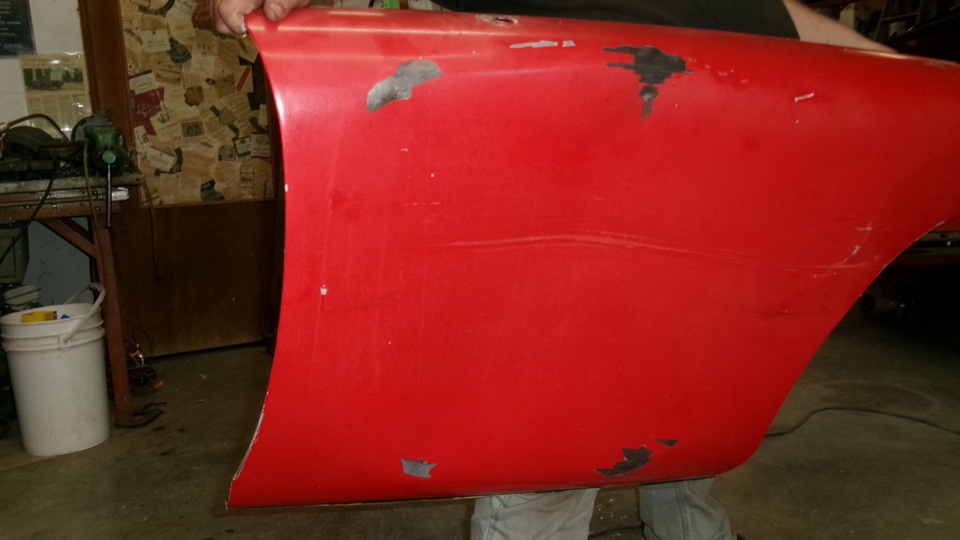
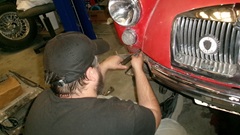
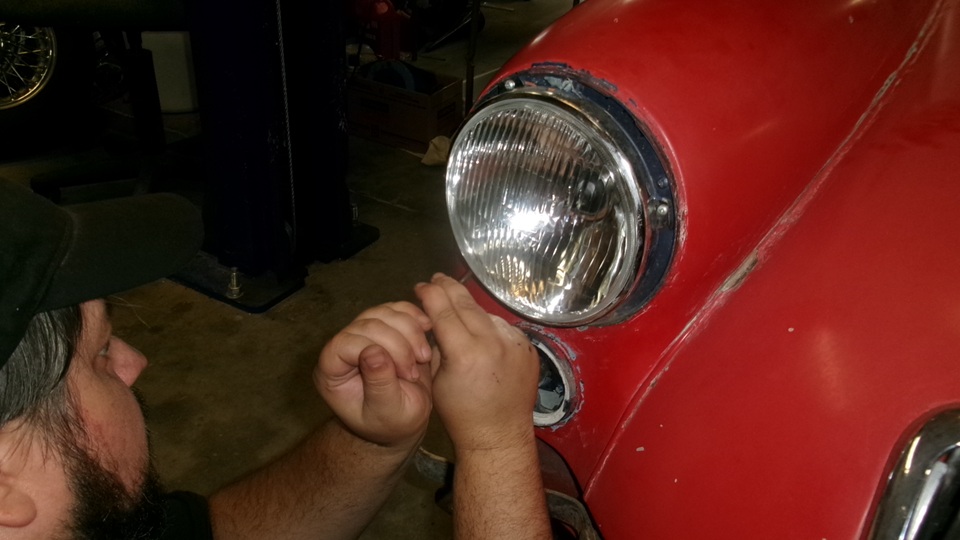
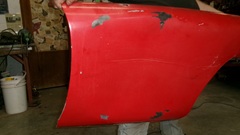
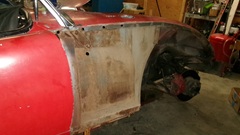
Meanwhile, we have something else to do. our host Stuart's regular driver MGA got a dented fender some time ago, and the neighbor who does excellent body work wants us to remove the fender from the car. So we do. We managed to remove the end section of the bumper to get access to the three screws securing the valance panel to bottom of the fender.Then remove the head light assembly, which required grinding the heads off of four mounting screws, because there were loose nuts in back that were corroded to foil removal. For the parking light and turn signal lamp, a couple taps with a manual impact wrench to loosen the screws, and they came right out, barely more than finger tight in the threads. All of the wiring snap connectors came apart with a good pull). Three #10 hex head screws securing valance to wing came out easily without damaging the floating captive nuts.
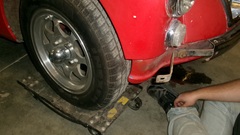
I spent half an hour being very careful and persistent with five #10 hex nuts securing the lower body trim strip, with only one broken stud. This was the original painted steel trim strip, not aluminum. Then three #10 screws came out of the fender bottom flange, again without damaging the floating captive cage nuts. Four 1/4" bolts inboard of the rear wing mount, and all of the 5/16" bolts along the wing piping joint came out without incident or any damage.
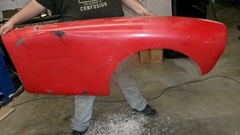
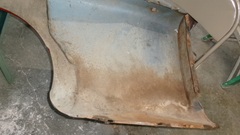

This is a true "California car", only 15,000 miles in 65 years, no rust perforation anywhere, just dirt and a little minor surface rust. After the fender dent repair, I suspect the car may get a full outer body repaint. Otherwise, I suppose just reassemble and put it back on the road? Okay, put the wheel back on,and drop it back on the roller dollies to stow it away for a while longer.

Wednesday, June 3, 2026:
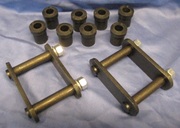
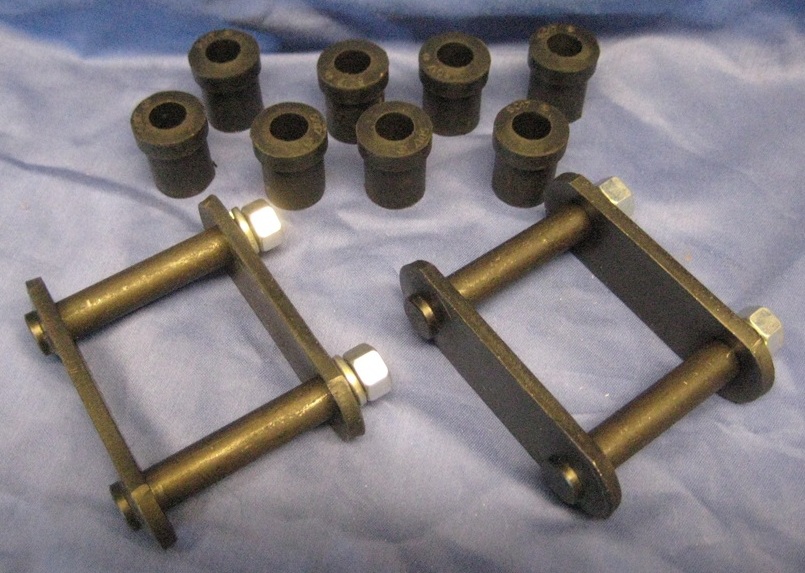
Uploaded a new Faulty Replacement Parts tech page FT-119 for Urethane Bushings for leaf spring shackles that Do Not Fit. Then catch up with the photos and notes (above) from day before.
Thursday, June 4, 2026:
Seems like we had black bear rummaging around in the dumpster this morning, making three days in a row. If it continues to be a nuisance, someone may have to do something about it.
 Most of the day spent finishing a near week long project. I just uploaded about 25 new Part Numbers tech pages for parts of the MGA Windscreen Washer assemblies (plural). With all of the production changes, this has to be one of the most complicated options on the car. You can start with this page : AHH5700 Screenwasher Kits.Most of the pages are very similar in appearance, except for the headers and the links at the bottom of each page. Every page has cross links to all of the other pages, so you can jump to any part of the assembly (assemblies) with a single click. Most of the day spent finishing a near week long project. I just uploaded about 25 new Part Numbers tech pages for parts of the MGA Windscreen Washer assemblies (plural). With all of the production changes, this has to be one of the most complicated options on the car. You can start with this page : AHH5700 Screenwasher Kits.Most of the pages are very similar in appearance, except for the headers and the links at the bottom of each page. Every page has cross links to all of the other pages, so you can jump to any part of the assembly (assemblies) with a single click.
Friday, June 5, 2026:
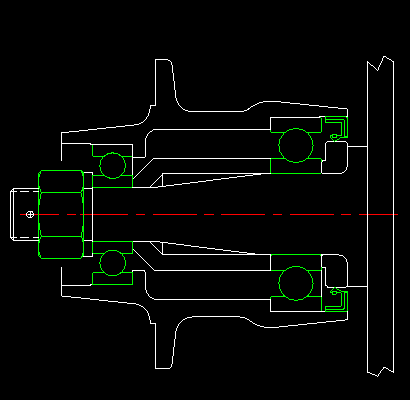
Start the day with posting a new tech page for Font Wheel Bearing Assembly. -- Mid afternoon shopping trip to restock the food larder.
Saturday, June 6, 2026:
Getting back to investigating the outdoor to indoor WiFi problem in the all steel building. This time we put the WiFi extender/repeater directly under an open garage door where it could catch the weak WiFi signal from about 100 yards away, amplify it and re-broadcast it (in all directions). That filled at least half the building with a useful WiFi signal, proving that the repeater works.
Then we attached the remote antenna in place of one of the stick antenna on the repeater, left the repeater outside with the remote antenna inside, and closed the door. After some fiddling to get the antenna connected to the correct"output" antenna terminal on the repeater, we finally got it to work minimally well enough to allow the computers to work inside with the door closed, as long as the computers were close to the antenna. And it worked both ways with download and upload, meaning the repeater was amplifying the antenna signal to broadcast it back to the home router. Okay, another small step. Now the computers work inside with the door closed, showing that the antenna works. We also connected 50 feet of coax cable between the repeater and the antenna, so the antenna could be positioned farther into the building, and that still worked the same. But the non-powered antenna doesn't have a strong enough signal to reach more than 25 feet, so it cannot fill the building with a strong signal. And the greater the distance from antenna to computer, the weaker the signal.
Now we think we have this figured out. It needs a powered repeater outside to pick up the weak WiFi signal to amplify it and send it inside. And it needs another repeater inside to produce a strong enough signal to fill the whole building with service. And we need to connect the two repeaters together with a signal cable running from outside to inside. the repeater we already have works well inside. Now we need another weatherproof repeater for outside. And since the repeaters have one or two Ethernet connector ports, we intend to buy about 75 feet of Ethernet cable for the connection between the two repeaters. Then we can place the indoor repeater near center of the building with enough latitude to run the Ethernet cable along the roof beans out of harms way. Assuming this will all work, there will be a cheap remote antenna and 50 feet of SMA coax cable left unused ($45 extra spent on the learning curve).
Meanwhile, the pottery shop was open all day,also blacksmith class all day, wine tasting (and sales) was open noon to 6-pm, and there was a concert in the park 7-pm to 10-pm. We were happy to stay out of the way inside the workshop with the doors closed, and our computers working.
Sunday, June 7, 2026:


Start the day with ordering the weatherproof outdoor WiFi repeater, and a 75-foot Ethernet cable. Amazon says they should be delivered Tuesday. -- More work on Part Numbers tech pages for gearbox rear seal parts.
Monday, June 8, 2026:
Finished and uploaded first pass on 10 new Part Numbers tech pages for MGA gearbox rear seal parts, and got them uploaded, starting here: 1H3084. Still need to add a few more notes and more pictures. but most of the grunt work is done.
Tuesday, June 9, 2026:
Got the 10 new Part Number tech pages finished, mostly just adding pictures of the parts. 1H3084
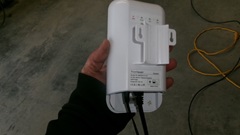
The weatherproof outdoor WiFi repeater and Ethernet cable arrived. Not long to plug in the parts, place the new repeater outside, move the other repeater inside, back to a power outlet in center of the building. Then connect the two repeaters together with the Ethernet cable running under the garage door (lying on the floor for now). Then close all of the steel doors, and it works like a charm. Both repeaters put out a 4-bar strong WiFi signal. The outdoor repeater signal seems to reach few hundred feet farther up the hill past the building. The indoor repeater clearly fills the whole building with strong WiFi, for which there is another user already. Still needing to physically mount the repeaters somewhere, and get a lamp cord extension to each one. The next issue there is that there is a severe shortage of power outlets inside this building, and none at all outside.

Wednesday, June 10, 2026:
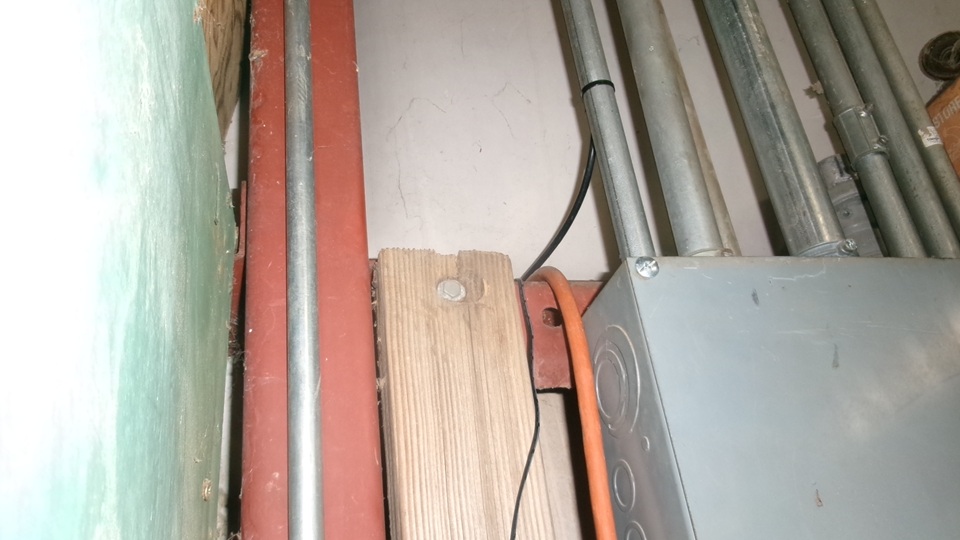
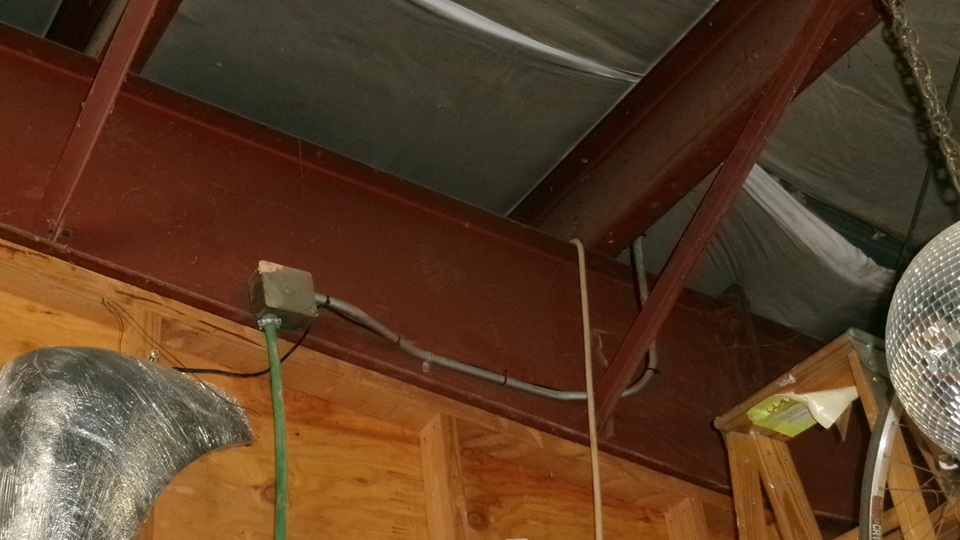
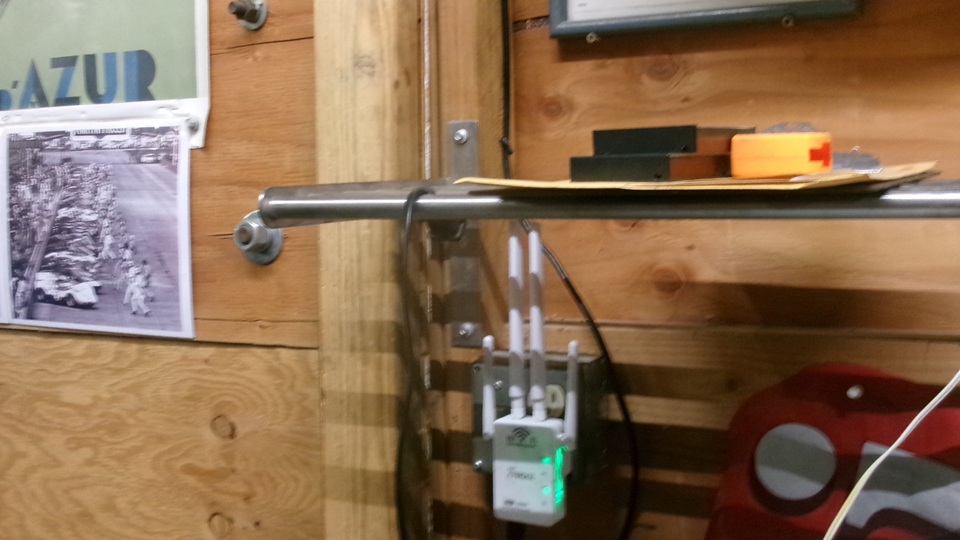
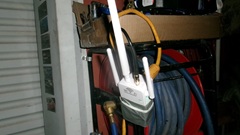
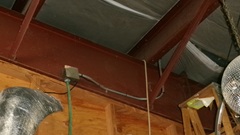
Last night we proved the new WiFi repeaters would work. Today we get to physically install the stuff with professional looking fit and reliable manner, meaning get the cables off the floor and tie them up where they won't get damaged. We started with the outdoor repeater, getting it tie-wrapped onto a fat steel pipe that is stanchion for a high outdoor yard light. Then we ran the small DC power wire from inside to outside through an existing hole with plastic grommet that was the pass-through for the yard light AC power wire. That needed a Dremel grinder to elongate the hole through the steel wall enough to move the AC cable aside far enough to pass the small DC power wire coax connector and the Ethernet cable connector. Then split the plastic grommet to open it up on one side to wrap around all three wires, and push the grommet back through the steel wall. Aside from a couple of ladders and the grunt work, it wasn't too bad. Third picture below shows the three wires inside, the orange AC cable going down, the thin black DC wire going down, and the thick black Ethernet cable going up where it is tie-wrapped to an electrical conduit.

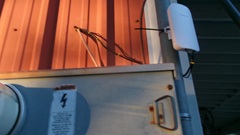

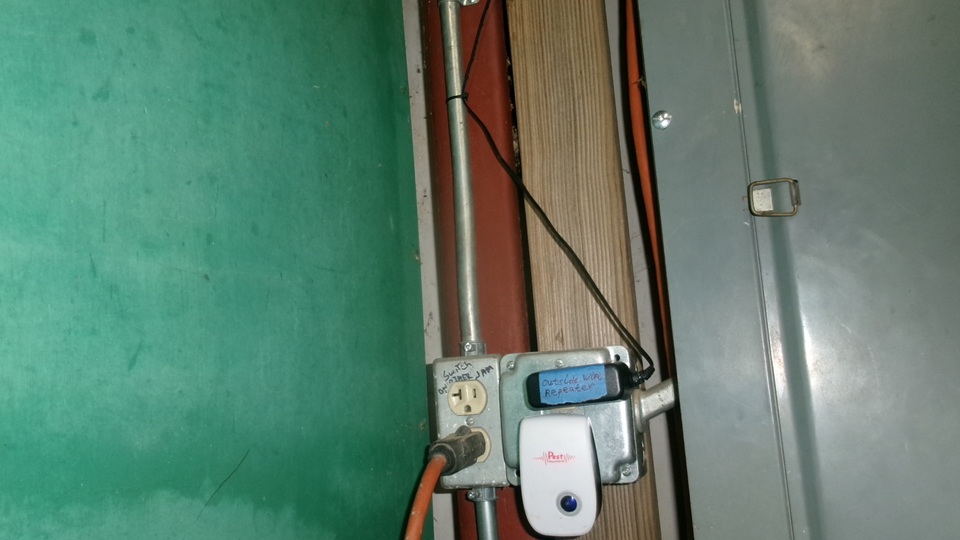
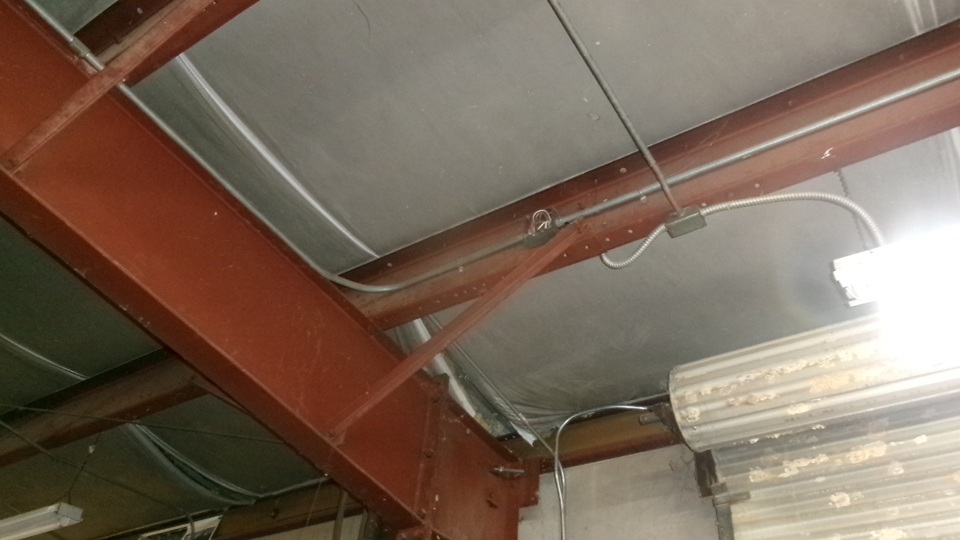
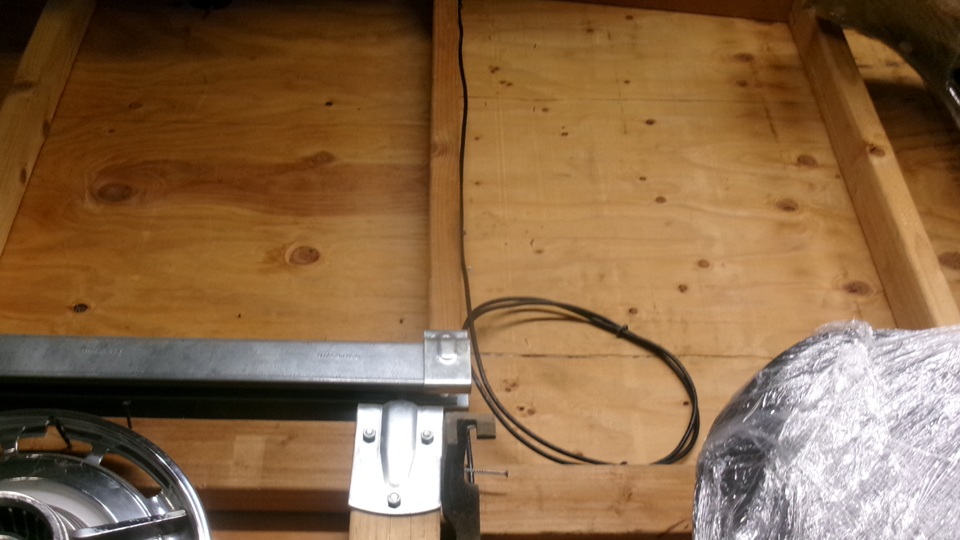
We were very lucky that the DC power wire (about 6-feet long) was just long enough to reach, so we could plug the little power supply into an existing outlet inside without needing an extension cord (below left). The small white box with blue light is an ultrasonic pest repellent. There are several of those around the building. No idea if it works or not, as there is at least one mouse in the house. Second picture below shows the Ethernet cable tie-wrapped to the conduit on the left running up then to the right (high under the roof), disappearing inside the outboard side of the C-channel roof beam. Third picture below shows the opposite inboard side of the C-channel beam with another conduit on this side.
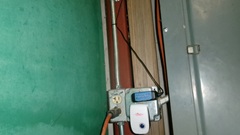
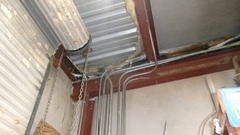

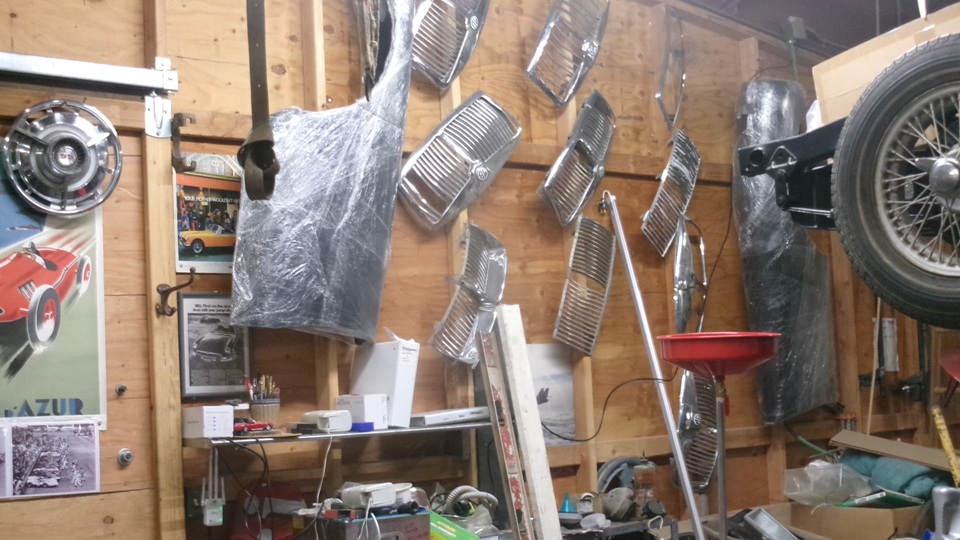
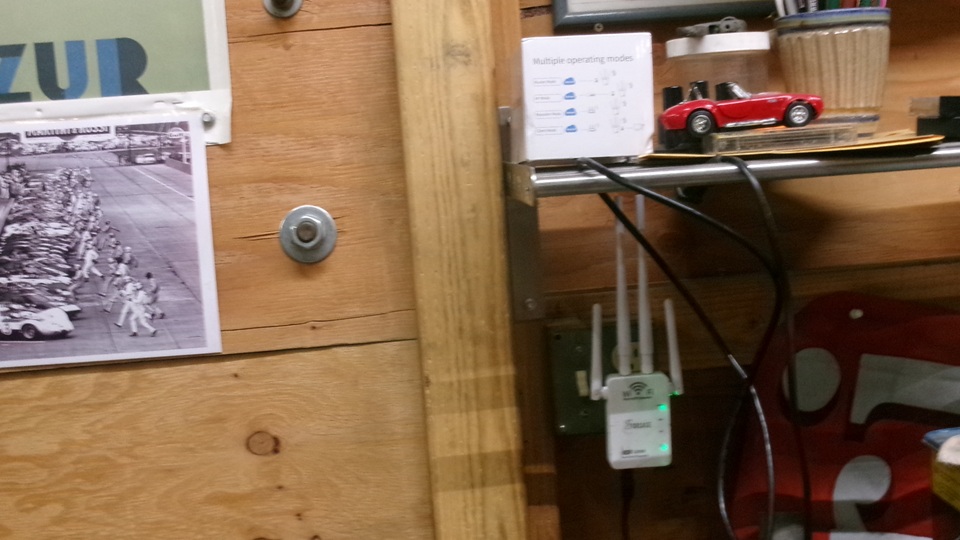
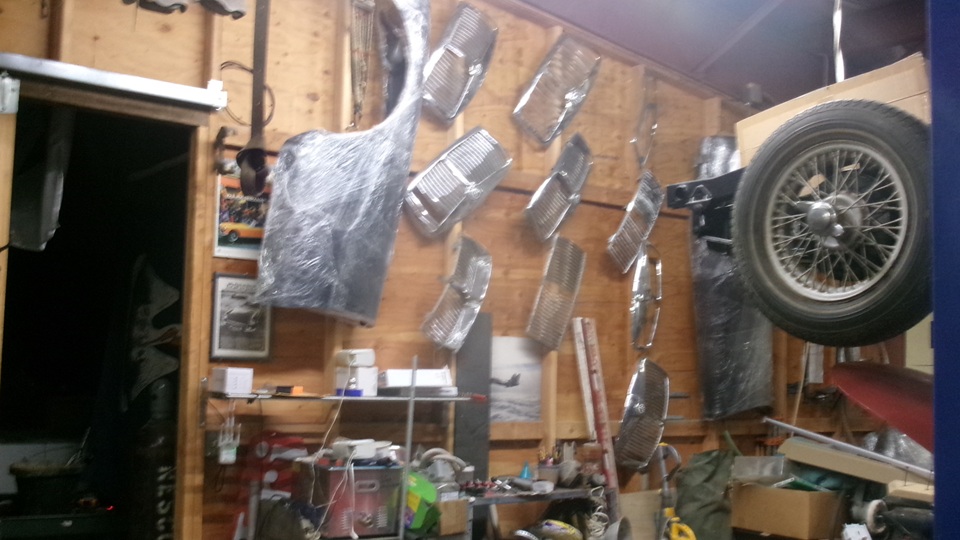
About 38 feet farther down we have the larger steel cross beam over the center wood structure dividing wall. The Ethernet cable has been following the conduit inside the C-channel to this point, where another conduit emerges from the C-channel going downward and to the left. This one terminates at a junction box with a downfall flex conduit, where we run out of steel conduit. From there on we will use insulated staples to attach the Ethernet cable to the wood wall top plate heading toward center of the building. Just before the center sliding pass-through door, the cable will drop down the side of one of the studs to terminate at the indoor repeater. Then an interesting picture of the center wall with a couple of MGA front wings and several chrome grilles hung up for storage. the last picture is the indoor repeater plugged into a duplex AC outlet with the Ethernet cable plugged into the bottom only waiting for a hand full of staples to finish the cable installation. And I have to say, there was hell of a lot of ladder climbing today, and a lot of time moving "stuff" on the floor to make space for the ladders near the wall.


So far $135 in materials, including $53 worth of remote antenna and coax cable and coax adapter connectors we will be "returning to inventory", not needed. So $82\for the two repeaters and 75 feet of Ethernet cable. And this stuff works great. With the repeaters turned off, the data speed we get at the "near corner" of the building (closest to the incoming WiFi signal source) is 12.5-Mb/s download and 2.5-Mb/s upload. With all steel doors closed and the repeateors turned on, we get exactly the same data speed inside the building. That's perfect? As good as possible, so we win. It was a lot of hard work today, but call it a good day's work.
Thursday, June 11 2026:
Don't stand in the hot sun too long today. Mid day trip down the hill a few miles to pick up insulated staples from a hardware store. Also picked up a fiberglass repair kit to fix a few cracks in the Magic Trailer (after being rear-ended by the school bus in Austin, Texas). Hit the local grocery to repack the larder before running back up the hill.
After lunch, back to work to finish attaching the last 25 feet of Ethernet cable to the wood wall in center of the otherwise all steel building. Moving more stuff on the floor, out of our way and another hour of ladder climbing. The Ethernet cable is finally stapled to the wall top plate, running right to left, then down the side of the wood stud next to the central pass through door. Plug the cable into the indoor repeater with a short J-loop, and staple the cable to the wall stud just above. Finish with two loops to secure an excess 5 feet of cable to the wall with a few more staples, and the deed is done.


Verify that the WiFi still works before another hour to put everything we moved in the past few days back where it was before. Just grunt work, but stressful enough for the old mam. Take the rest of the day to cool off and relax.
Friday, June 12 2026:
Ten days ago we had removed a dented RF wing from Stu's driver MGA, because it needed dent repair. While this is going on, it is intended to repaint the whole car, so more disassembly is in order (because it had paint over piping in past years). But shop space is at a premium, and the MGA had been moved while someone was working on another car, so no more disassembly today.
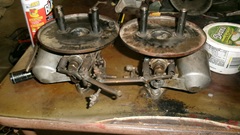
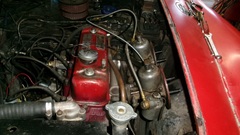
So there was a few hours of table time to disassemble carbs, clean and polish jets and dashpot parts, install new jet seals and put them back together with properly centered jets and all free movements. There were two carb mounting studs missing from the intake manifold, and no one knew why or where the were, so we snatched a couple from another spare manifold to continue on. By evening the carbs were installed and the car was running again. Not sure yet when (or if) we might continue with body disassembly.

|